"Sir, where do I start?" I hear this in almost every new batch.
I have been the Lead MERN Trainer at Saylani Mass IT Training (SMIT) since October 2020. Before and alongside that, I have been building web and mobile apps since 2017, for my own products at Islamic Desk and 12Monday and for clients. The roadmap below is the order I actually follow in class. It is not the only path, but it is the one I have seen work for beginners who have a laptop, an internet connection and a few hours a day.
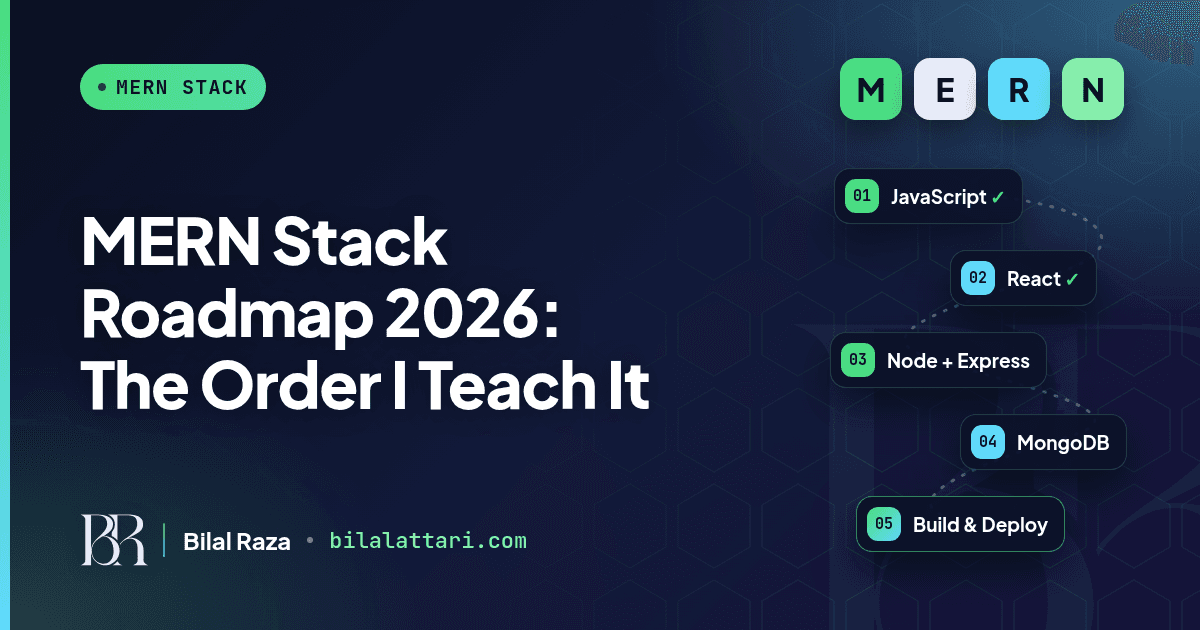
The short version: JavaScript first, then React, then Node and Express, then MongoDB, then glue it all together and ship.
Why Order Matters More Than Speed
Most students who get stuck did not fail because MERN is hard. They got stuck because they jumped. They opened a React tutorial without understanding arrays, or tried Express without knowing what a request is. Every layer of MERN sits on the one below it. If the base is shaky, everything above it feels like magic, and magic is impossible to debug.
So my rule is simple: do not move to the next stage until you can build something small in the current one without copying.
Here is the whole roadmap at a glance:
| Stage | What you learn | What you build |
|---|---|---|
| 0 | HTML and CSS, Git and GitHub, your tools | A personal portfolio page and one landing page clone, deployed for free |
| 1 | JavaScript, properly | A to-do app with local storage, a weather app using a public API, and a quiz app |
| 2 | React (the "R") | A movie or product search app with routing, a details page and a favourites list |
| 3 | Node.js and Express (the "N" and "E") | A REST API for notes or products with full CRUD, tested in Postman |
| 4 | MongoDB (the "M") | Replace the in-memory array from Stage 3 with MongoDB |
| 5 | Put it together and ship | One complete app with login, roles and real data |
| 6 | What comes after MERN | TypeScript, Next.js, React Native with Expo, Firebase |
Stage 0: The Basics You Cannot Skip
Before MERN, you need three things:
- HTML and CSS. Semantic tags, forms, Flexbox, Grid and responsive layouts. You do not need to be a designer. You need to be able to turn a simple design into a page.
- Git and GitHub. Commit, push, branches and pull requests. Every project from here on goes on GitHub.
- Your tools. VS Code, the browser DevTools, and the terminal. Learn to read an error message before you Google it.
Build: a personal portfolio page and one landing page clone. Deploy both for free.
Stage 1: JavaScript, Properly
This is the stage people rush, and it is the one I spend the most time on. MERN is JavaScript from top to bottom, so this is your real foundation.
What to cover
- Variables, types, functions, scope and closures
- Arrays and objects, especially
map,filter,reduce,findand destructuring - The DOM and events
- Asynchronous JavaScript: callbacks, promises and
async/await fetchand working with JSON from a real API- ES modules (
import/export)
If you can read this snippet and explain every line, you are ready for React:
async function getUsers() {
  try {
    const res = await fetch("https://jsonplaceholder.typicode.com/users");
    if (!res.ok) throw new Error(`HTTP ${res.status}`);
    const users = await res.json();
    return users
      .filter((u) => u.email.endsWith(".biz"))
      .map(({ id, name }) => ({ id, name }));
  } catch (err) {
    console.error("Could not load users:", err.message);
    return [];
  }
}
Build: a to-do app with local storage, a weather app using a public API, and a quiz app.
Stage 2: React (The "R")
Once JavaScript feels natural, React is mostly about learning a new way to think: your UI is a function of your data.
What to cover
- Components, props and JSX
- State with
useState, side effects withuseEffect - Lists, keys, conditional rendering and forms
- Routing with React Router
- Fetching data, loading states and errors
- Shared state with Context, and later a data library such as TanStack Query
Start projects with Vite. It is fast and keeps the setup out of your way:
npm create vite@latest my-app -- --template react
cd my-app
npm install
npm run dev
Build: a movie or product search app that talks to a public API, with routing, a details page and a favourites list.
Stage 3: Node.js and Express (The "N" and "E")
Now you move to the server. The good news is that it is the same language.
What to cover
- What Node is,
npm, andpackage.json - HTTP basics: methods, status codes, headers and JSON bodies
- Express routes, middleware and error handling
- Environment variables with a
.envfile (and keeping it out of Git) - Testing your API with Postman or a similar tool
Use the version that nodejs.org currently labels LTS. As I write this, that is Node 24. A minimal Express API looks like this:
import express from "express";

const app = express();
app.use(express.json());

const products = [{ id: 1, name: "Keyboard" }];

app.get("/api/products", (req, res) => res.json(products));

app.post("/api/products", (req, res) => {
  const product = { id: Date.now(), name: req.body.name };
  products.push(product);
  res.status(201).json(product);
});

app.listen(5000, () => console.log("API running on port 5000"));
Build: a REST API for notes or products with full CRUD, tested in Postman.
Stage 4: MongoDB (The "M")
Your API needs to remember things after a restart. That is where MongoDB comes in.
What to cover
- Documents, collections and how they differ from SQL tables
- A free cluster on MongoDB Atlas
- Mongoose schemas, models and validation
- CRUD queries, filtering, sorting and pagination
- Relationships with references and
populate
import mongoose from "mongoose";

const productSchema = new mongoose.Schema(
  {
    name: { type: String, required: true, trim: true },
    price: { type: Number, required: true, min: 0 },
  },
  { timestamps: true }
);

export const Product = mongoose.model("Product", productSchema);
Build: replace the in-memory array from Stage 3 with MongoDB.
Stage 5: Put It Together and Ship
This is where you become a MERN developer instead of someone who did four tutorials.
What to cover
- Connecting your React app to your own API, and handling CORS
- Authentication: hashing passwords with bcrypt, JWTs, protected routes on both sides
- File and image uploads
- Basic security: input validation, never trusting the client, never committing secrets
- Deployment: frontend on a static host, API on a Node host, database on Atlas
Build: one complete app with login, roles and real data. An e-commerce store, a blog with an admin panel, or a small LMS are good choices. Put the live link and the GitHub repo on your CV.
Stage 6: What Comes After MERN
Once you have shipped one full app, these are the next steps I suggest to students, in this order:
- TypeScript. Most serious codebases use it now, and it catches bugs before your users do.
- Next.js. For SEO-friendly sites and full-stack React in one project.
- React Native with Expo. Your React skills carry over to Android and iOS apps. I wrote about my Expo setup here.
- Firebase. Handy for quick prototypes, auth and push notifications.
Common Mistakes I See in Every Batch
- Tutorial loops. Watching five courses on the same topic instead of building one project.
- Skipping JavaScript. React will punish you for it.
- No GitHub history. Clients and employers want to see your work, not hear about it.
- Copy-paste without reading. If you cannot explain your own code, you cannot fix it.
- Waiting to feel ready. Start applying for internships and small freelance gigs once your Stage 5 project is live.
How Long Does It Take?
Honestly, it depends on your hours and your consistency. I do not like promising timelines, because I have seen students with the same starting point finish at very different speeds. What I can tell you is that consistent daily practice beats weekend marathons every time.
Wrapping up
Most of what I teach in class is also free on my YouTube channel, Code Aur Bilal, with playlists on JavaScript, React, Node and Express, Next.js, TypeScript, Firebase and TanStack Query. My class repositories are on GitHub.
If you are following this roadmap and get stuck, or you are a company looking for MERN or React Native developers, I would love to hear from you. Email me at attari1235@gmail.com or reach out through bilalattari.com.